
Easter Egg Peanut Butter Candies
Creamy Peanut Butter Eggs
INTRODUCTION
We are a small circle of home cooks who savor cozy meals and the gentle rhythm of everyday cooking, finding comfort in simple, reliable recipes for real kitchens and busy nights. This Easter Egg Peanut Butter Candies recipe was developed to be joyful and easy, a sweet project that brings familiar flavors together with little fuss and big smiles. The process of shaping and dipping peanut butter eggs is calming and tactile, and the result is a creamy, chocolate-coated treat that practically begs to be shared. If you love approachable sweets and weeknight favorites, you may also enjoy amazing slow cooker butter chicken with veggies.
Fast Facts at a Glance
- Prep Time: 20 minutes plus chilling time. – Cook Time: 10 minutes or less for melting chocolate. – Total Time: About 1 hour 40 minutes including chilling. – Servings: Makes roughly 30 small eggs depending on size. – Difficulty: Beginner-friendly; great for first-time candy makers. – Cuisine: American-inspired holiday confection. – Best Season: Spring and holiday gatherings.
Why These Eggs Delight
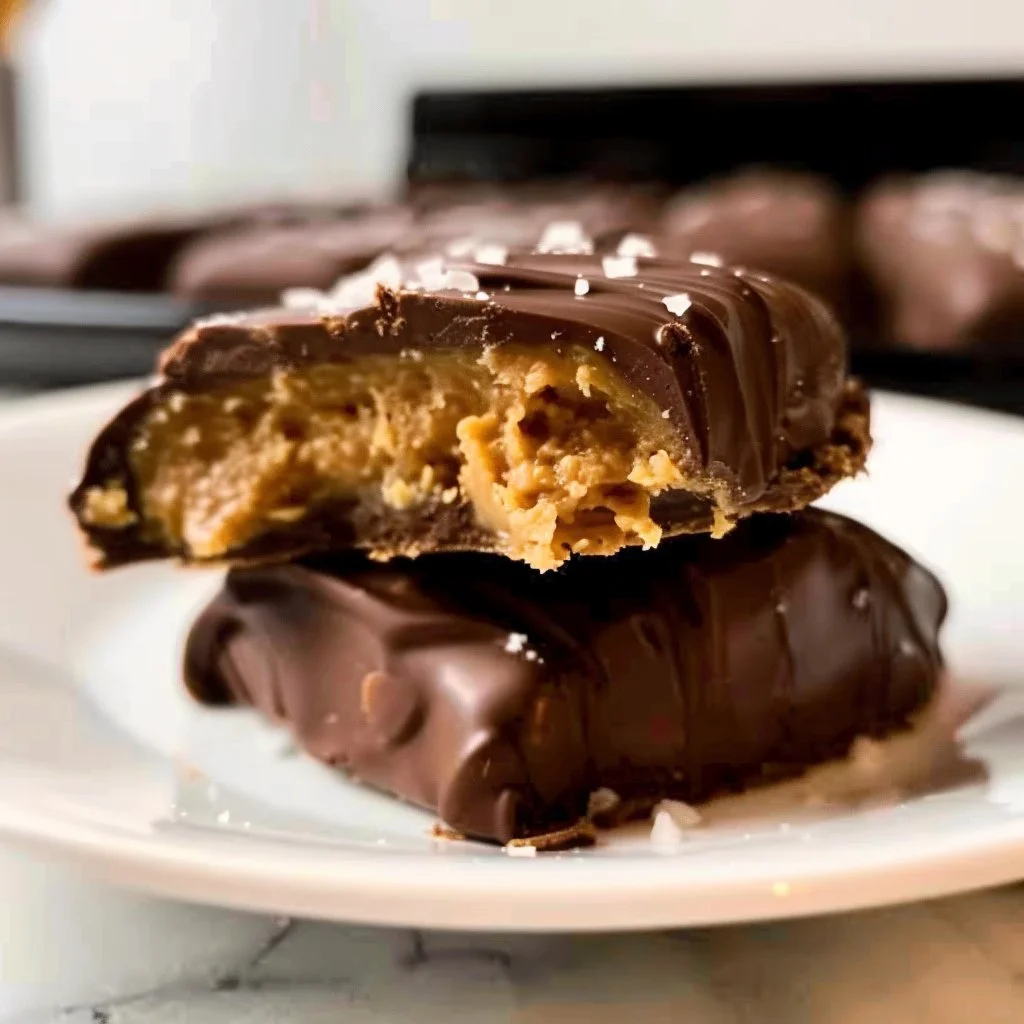
- Rich, familiar flavor: The peanut butter center is smooth and buttery, brightened with a touch of vanilla for depth and warmth. This flavor profile feels cozy and nostalgic without being overly sweet. – Easy to make at home: The recipe uses a handful of pantry staples and straightforward steps that work even if you are new to candy-making. It is forgiving and comes together quickly with simple tools. – Perfect for gifting and gatherings: These bite-sized eggs fit in a tin or box and feel like thoughtful homemade presents for friends, family, or neighbors. They also look festive when dotted with sea salt or sprinkles. – Textural contrast: The crisp chocolate shell gives way to a soft, creamy center that melts on the tongue and pairs beautifully with a flaky sea salt finish. This contrast makes each bite interesting and comforting.
All Ingredients You Need
- 6 Tablespoons (85g) unsalted butter, softened to room temperature – 1 cup (250g) creamy peanut butter (not natural style) – 2 and 1/2 cups (300g) confectioners’ sugar – 1/2 teaspoon pure vanilla extract – 1/8 teaspoon salt – 12 ounces (3 4-ounce bars) semi-sweet chocolate bars (339g), coarsely chopped* – 1 teaspoon vegetable oil – optional: coarse sea salt or flaky sea salt, for topping
Ingredient Notes and Swaps
- 6 Tablespoons unsalted butter : Use room temperature butter for smooth mixing; swap for vegan butter to reduce dairy. – 1 cup creamy peanut butter : Choose commercial creamy peanut butter (not natural) so the oils do not separate; for peanut-free, try creamy sunflower seed butter. – 2 and 1/2 cups confectioners’ sugar : Sift if lumpy for a silky filling; powdered sugar is the backbone for a stable texture. – 1/2 teaspoon pure vanilla extract : Adds warmth and rounds the flavors; use almond extract sparingly for a different twist. – 12 ounces semi-sweet chocolate : Coarsely chopped bars melt more evenly than chips; use a mix of dark and semi-sweet for a slightly less sweet shell. – 1 teaspoon vegetable oil : Thins melted chocolate for smoother dipping and shine; coconut oil is a fine alternative for a subtle flavor change.
Step-by-Step Candy Assembly
- Line a large baking sheet with parchment paper or a silicone baking mat. Set aside. 2. With a handheld or stand mixer fitted with a paddle attachment, beat the butter on medium-high speed until creamy and smooth, about 2 minutes. Add the peanut butter and beat until combined, about 1 minute. If you notice any small chunks of butter, don’t worry-the mixture will smooth out. 3. Add the confectioners’ sugar, vanilla extract, and salt, and beat on low speed for 2 minutes until everything is combined. The mixture will be a little soft and crumbly. 4. Measure 1.5 Tablespoons (about 1 ounce, or 29 grams) of peanut butter mixture. Roll into a ball. Flatten the ball between your palms and use your fingers to narrow one end into an egg shape. The egg should be roughly 3/4 inch thick. Place on the prepared baking sheet. Repeat with remaining peanut butter mixture. The mixture can be a little crumbly, but the warmth of your hands will bring it together. If you find the peanut butter mixture becoming too soft to handle, chill in the refrigerator for 15 minutes. Alternatively, you can powder your hands with confectioners’ sugar, which helps prevent the filling from sticking to your hands. 5. Chill the shaped peanut butter eggs in the refrigerator for at least 1 hour and up to 1 day. During the last few minutes of the chilling time, begin melting the chocolate and oil together. You can melt it in a double boiler or the microwave. If using the microwave: place the chocolate and oil in a medium heat-proof bowl. I recommend using a liquid measuring cup because its depth makes dipping really easy. Melt in 20-second increments in the microwave, stirring after each increment, until completely melted and smooth. Let the warm chocolate sit for 6-8 minutes to cool slightly before dipping, otherwise it will melt the shaped peanut butter eggs. 6. Remove peanut butter eggs from the refrigerator. Working with one at a time, submerge into the chocolate and then carefully lift out using a fork. Tap the fork gently on the side of the bowl/measuring cup to rid excess chocolate. Use a toothpick or a second fork to help slide the candy off of the fork and onto the baking sheet. If the eggs are softening and losing their shape as you’re dipping them, put the baking sheet back in the fridge for 5-10 minutes and then try again. 7. If you have leftover chocolate, drizzle it over the candies. I reheat leftover chocolate and use a spoon or squeeze bottle to drizzle. If desired, lightly sprinkle each with coarse or flaky sea salt or festive sprinkles while chocolate is still wet. 8. Refrigerate coated candies for 30 minutes or until chocolate has completely set before serving. 9. Layer peanut butter eggs between sheets of parchment or wax paper and store in an airtight container in the refrigerator for up to 2 weeks. The filling can get a little soft, so they taste best right out of the refrigerator. We love them right out of the freezer, too! (Technique notes: Work quickly when dipping so chilled centers keep shape; a shallow, deep vessel like a liquid measuring cup makes dipping neat and fast. Chill trays between batches to keep shapes crisp and use two forks to transfer without fingerprints.)
Master-Level Tips for Success
- Temperature control is key: Keep the peanut butter shapes well chilled so the chocolate sets cleanly without bulging or cracking. – Chocolate handling technique: Stir melted chocolate consistently and avoid overheating; a gentle warm bath or short microwave bursts prevent graininess. – Size and portioning: Use a small cookie scoop or tablespoon measure for uniform eggs so they set evenly and look professional. – Finishing touches: Sprinkle flaky sea salt just as the chocolate sets to highlight the sweet-salty contrast and create a pretty, bakery-style finish.
Fun Variations to Try
- Vegan version: Substitute vegan butter, use dairy-free creamy peanut butter, and choose vegan chocolate for the coating. The texture will be slightly different but still indulgent and rich. – Milder, kid-friendly: Use milk chocolate for the coating and skip the sea salt, adding colorful sprinkles for a festive presentation children will love. – Spicy peanut butter twist: Stir in a pinch of cinnamon and a tiny amount of cayenne to the filling for a warm, exotic kick that balances the sweet chocolate. – Regional flavor swap: Mix in a tablespoon of crushed toasted sesame seeds to the filling for a nod to East Asian flavors, or swirl in a little orange zest for a citrusy lift.
Pairings That Complement These Candies
- Beverage pairing: A cup of robust coffee, creamy hot chocolate, or a chilled glass of milk highlights the candies’ richness and cuts through the sweetness. – Side ideas: Serve with a small selection of fresh fruit, like strawberry halves or thin apple slices, to add brightness on a dessert board. – Dessert plate companions: Add a few shortbread cookies or butter cookies for textural contrast and crowd-pleasing variety.
Make-Ahead, Storage, and Freezer Notes
- Prep ahead: Shape the peanut butter eggs and chill them up to 24 hours before dipping, which makes holiday prep run smoothly. – Refrigeration: Store finished candies in an airtight container layered with parchment and keep refrigerated for up to 2 weeks for best texture. – Freezing: Freeze on a tray until solid, then transfer to a sealed container for up to 3 months; thaw in the fridge before serving to avoid condensation on the chocolate. – Reheating caution: Avoid reheating coated candies; if chocolate becomes too firm, let sit at room temperature briefly to soften slightly.
Serving and Presentation Ideas
- Plating: Arrange candies on a small white platter or a rustic wooden board, alternating with sprigs of fresh mint or edible flowers for a springtime touch. – Gift packaging: Layer candies in a small tin or kraft box with parchment and a ribbon for a charming homemade gift. – Cozy vibes: Present with tea-light candles and a simple linen napkin for an inviting, warm dessert moment that feels personal and thoughtful.
Little Kitchen Secrets
- Use a deep measuring cup for dipping: It makes submerging and lifting smooth, reduces drips, and keeps hands cleaner. – Rest melted chocolate before dipping: Letting it cool slightly prevents the centers from melting and helps the chocolate set with a glossy finish. – Maintain a chilled tray: Place the baking sheet back in the fridge between batches to keep the centers firm and help the shell set quickly. – Keep tools ready: Have forks, toothpicks, and a small bowl of warm water on hand to smooth any stray drips and fix imperfections quickly.
Storage and Reheating Tips
- Refrigeration technique: Store candies in a single layer or layered with parchment to avoid sticking and preserve the crisp chocolate shell. – Microwave caution: Do not microwave the coated candies; it will soften the chocolate unevenly and ruin texture. – Stovetop fixes: If melted chocolate thickens while working, gently warm it over very low heat or a double boiler and stir until smooth. – Texture preservation: Keeping candies chilled preserves the contrast between the crisp shell and creamy center, which is part of their appeal.
Questions You Might Have
How long will these candies keep in the fridge?
When stored in an airtight container and layered with parchment, the candies will keep well in the refrigerator for up to 2 weeks. The centers stay creamy but may soften slightly over time, so they are best enjoyed cold or straight from the fridge. For longer storage, freeze them as described in the make-ahead notes. ### Can I use natural peanut butter instead of commercial creamy peanut butter?
Natural peanut butter tends to separate and contain more oil, which can make the filling too loose and greasy for shaping and coating. If you only have natural peanut butter, stir it thoroughly and consider reducing added butter slightly or chilling the mixture longer to help firm it up. ### What is the best chocolate to use for dipping?
High-quality semi-sweet chocolate bars are ideal because they melt smoothly and set with a nice snap; baking chocolate or couverture will also work. Avoid chocolate chips marked for baking because they can be stabilized and may not melt as glossy unless mixed with a small amount of oil. ### How do I stop the chocolate from getting dull or streaky?
Avoid overheating the chocolate and stir continuously while melting. Let the melted chocolate cool slightly before dipping and work on a cool surface; once dipped, set the candies in the fridge briefly to finish setting. ### Can I make these nut-free for guests with allergies?
Yes, substitute creamy sunflower seed butter or soy butter for the peanut butter and check that your chocolate is processed in a nut-free facility. The texture is slightly different but still delicious. ### Why did my filling crack or crumble when shaping?
If the filling is too dry, it will crack; if too warm, it will be sticky and lose shape. Chill the mixture briefly if it becomes too soft, and use powdered sugar-dusted hands to shape without sticking.

Nutrition Snapshot
- Serving Size: 1 candy (estimate) – Calories: 120 kcal (estimate) – Protein: 3 g – Carbs: 12 g – Fat: 8 g – Fiber: 1 g – Sugar: 10 g – Disclaimer: Nutrition facts are estimates and may vary.
A Note From the Kitchen
These Easter Egg Peanut Butter Candies are an invitation to slow down a little and enjoy hands-on cooking that rewards you with a little box of joy. The method is simple but the outcome feels special, perfect for sharing at a table where conversation and laughter are the main courses. Making them reminds us that foods passed between friends and family build small rituals and memories, and that humble ingredients can create something festive and comforting. Keep the process relaxed and the portions generous so everyone leaves with a sweet memory.
Ready to Make and Share
If you are ready to try these Easter Egg Peanut Butter Candies, gather your ingredients and enjoy the simple ritual of shaping, dipping, and decorating. Pin this recipe, share a batch with someone who loves home-baked treats, and take pride in a homemade confection that tastes like spring and comfort.
Easter Egg Peanut Butter Candies
Ingredients
Method
- Line a large baking sheet with parchment paper or a silicone baking mat.
- In a mixing bowl, beat the butter on medium-high speed until creamy and smooth, about 2 minutes.
- Add the peanut butter and beat until combined, about 1 minute.
- Add the confectioners' sugar, vanilla extract, and salt; beat on low speed for 2 minutes until everything is combined. The mixture will be a little soft and crumbly.
- Measure 1.5 tablespoons of peanut butter mixture, roll into a ball, and flatten to form an egg shape. Place on the prepared baking sheet. Repeat with the remaining mixture.
- Chill shaped eggs in the refrigerator for at least 1 hour or up to 1 day.
- Melt the chocolate and vegetable oil together either in a double boiler or in the microwave, stirring often.
- Once melted and smooth, let the chocolate cool slightly.
- Remove peanut butter eggs from the refrigerator. Dip each egg into the melted chocolate, tap to remove excess, and place back on the baking sheet.
- If any eggs soften while dipping, chill the baking sheet for a few minutes before continuing.
- Drizzle any leftover chocolate over the candies if desired, and sprinkle with sea salt or sprinkles while still wet.
- Refrigerate the dipped candies for 30 minutes until the chocolate is set.
- Layer the eggs between sheets of parchment and store in an airtight container in the refrigerator for up to 2 weeks.
- For longer storage, freeze until solid and transfer to a sealed container for up to 3 months.