
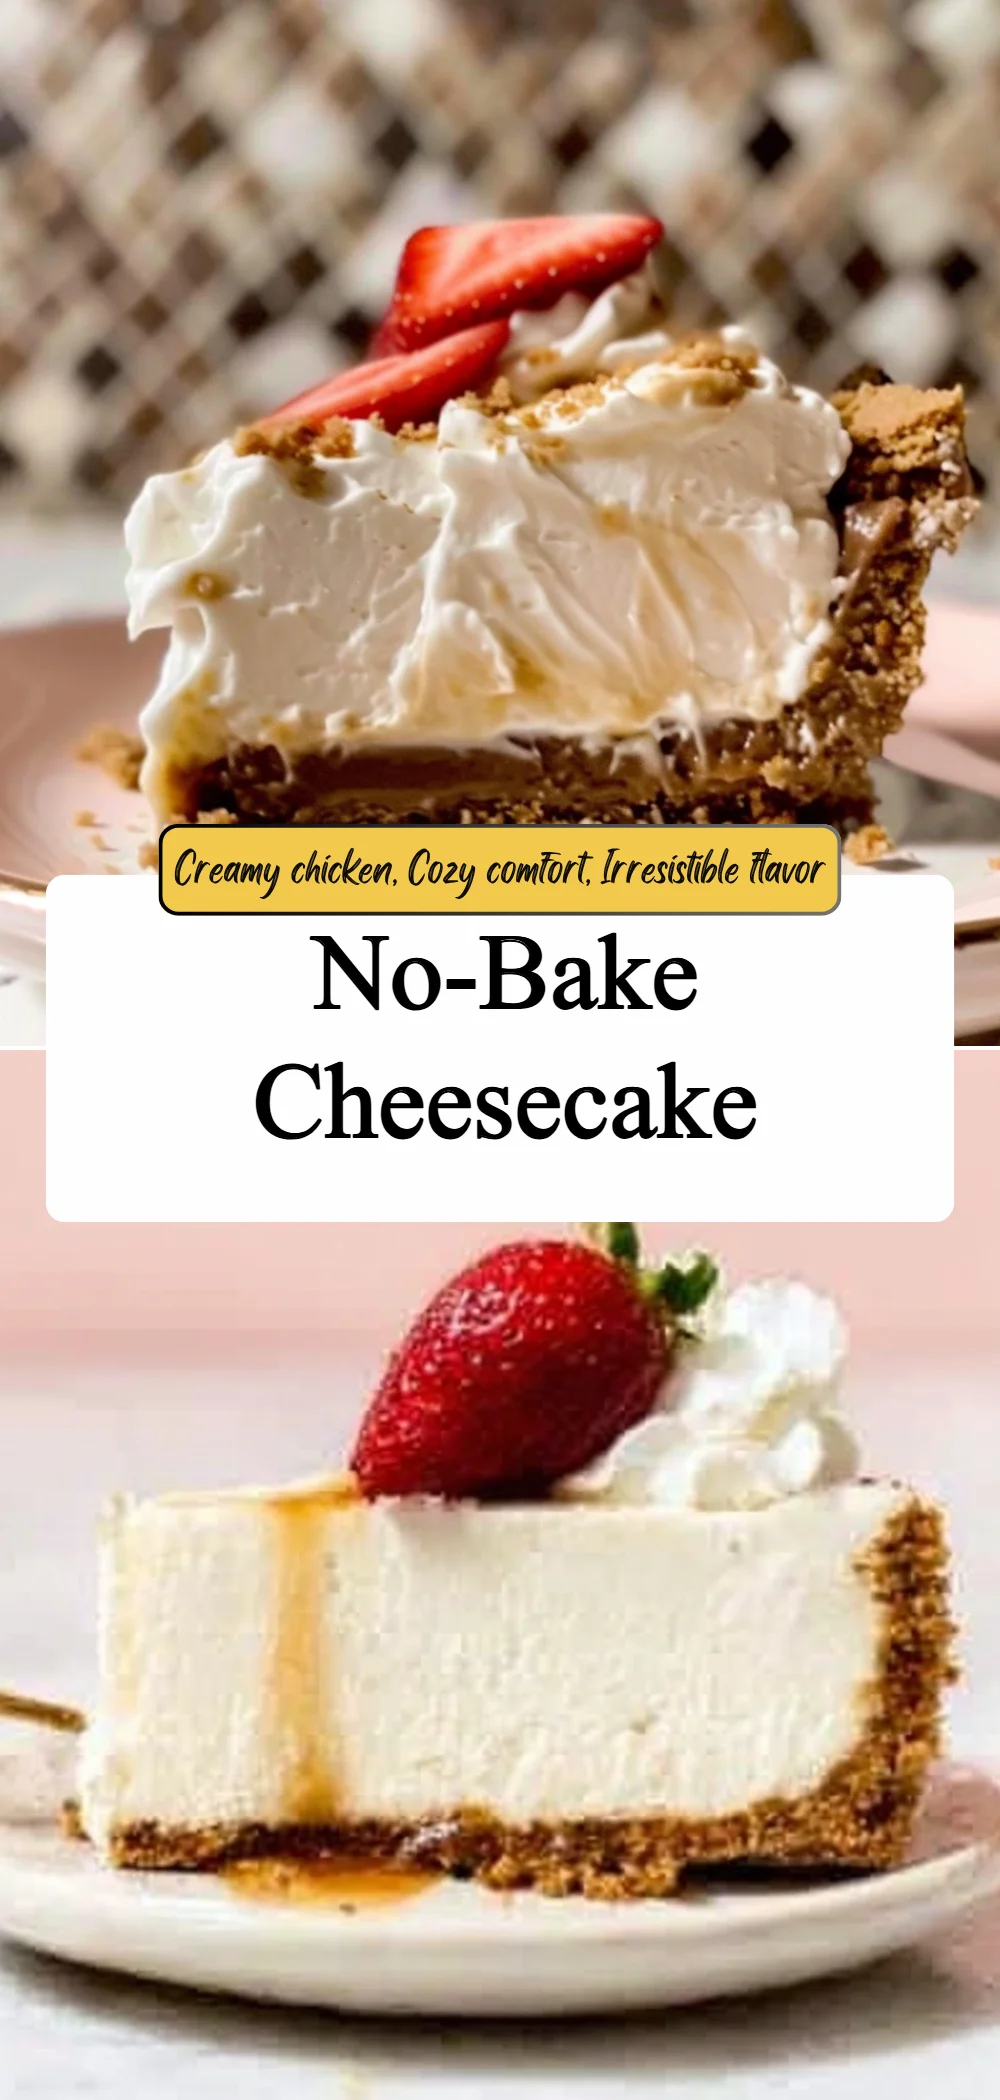
No-Bake Cheesecake
Delightfully Creamy Dessert
INTRODUCTION
In every gathering, desserts have a magical way of bringing joy and warmth to the table. Imagine a chilled slice of no-bake cheesecake, its silky smooth texture paired with a crumbly crust, evoking delightful memories of celebrations and shared laughter. Perfect for those hectic weeks and busy nights, this no-bake cheesecake recipe offers a straightforward path to a blissful dessert experience. Each step is crafted to ensure success, so you can create a comforting favorite that satisfies your sweet tooth and nourishes your spirit. Experience the joy of whipping this luscious cheesecake that invites friends and family to gather around the table for a slice of happiness.
Quick Recipe Overview
- Prep Time: 20 minutes
- Cook Time: 0 minutes
- Total Time: 6 hours (minimum chilling time)
- Servings: 10
- Difficulty: Easy
- Cuisine: American
- Best Season: Year-round
Reasons to Love This Cheesecake
- Rich Flavor: This no-bake cheesecake features a creamy filling that melts in your mouth, enhanced by the subtle zing of lemon juice that brightens every bite. It’s perfectly sweetened to make a wonderfully balanced dessert.
- Effortless Preparation: With simple steps and no baking required, you can whip up this cheesecake with minimal fuss, making it the ideal choice for a last-minute gathering or family dinner. The ease of preparation makes it accessible for every home cook.
- Versatile Dessert: Perfect for any occasion, whether a cozy family dinner, a festive birthday party, or a summer picnic. This cheesecake can be dressed up with your favorite toppings or served plain for a classic experience.
- Make Ahead: This no-bake cheesecake can be prepared in advance, allowing the flavors to meld beautifully as it chills in the fridge. Not only does this save time on the day of your gathering, but it also makes the cheesecake taste even better.
Essential Ingredients for Success
- 2 cups (240g) graham cracker crumbs (about 16 full sheet graham crackers)
- 1/3 cup (67g) packed light or dark brown sugar
- 1/2 cup (8 Tbsp; 113g) unsalted butter, melted
- 1 and 1/4 cups (300ml) heavy cream or heavy whipping cream
- 24 ounces (678g) full-fat brick cream cheese, softened to room temperature
- 1/2 cup (100g) granulated sugar
- 2 Tablespoons (15g) confectioners’ sugar
- 1/4 cup (60g) sour cream, at room temperature
- 2 teaspoons lemon juice
- 1 teaspoon pure vanilla extract
Tips for Choosing Ingredients
- Graham Cracker Crumbs: Choosing high-quality graham crackers enhances the flavor of the crust. For a twist, consider using chocolate or gluten-free options.
- Cream Cheese: Opt for full-fat brick cream cheese for the smoothest texture in your cheesecake. Avoid using whipped or spreadable cream cheese as it may affect the consistency.
- Fresh Cream: Heavy cream is essential for creating that fluffy whipped cream topping. Store it properly and check the expiration date for optimal freshness.
- Lemon Juice: Freshly squeezed lemon juice adds a bright and zesty flavor, but bottled lemon juice also works in a pinch. This acidity balances the richness of the cream cheese.
Step-by-Step Instructions
- Stir the graham cracker crust ingredients together until well mixed.
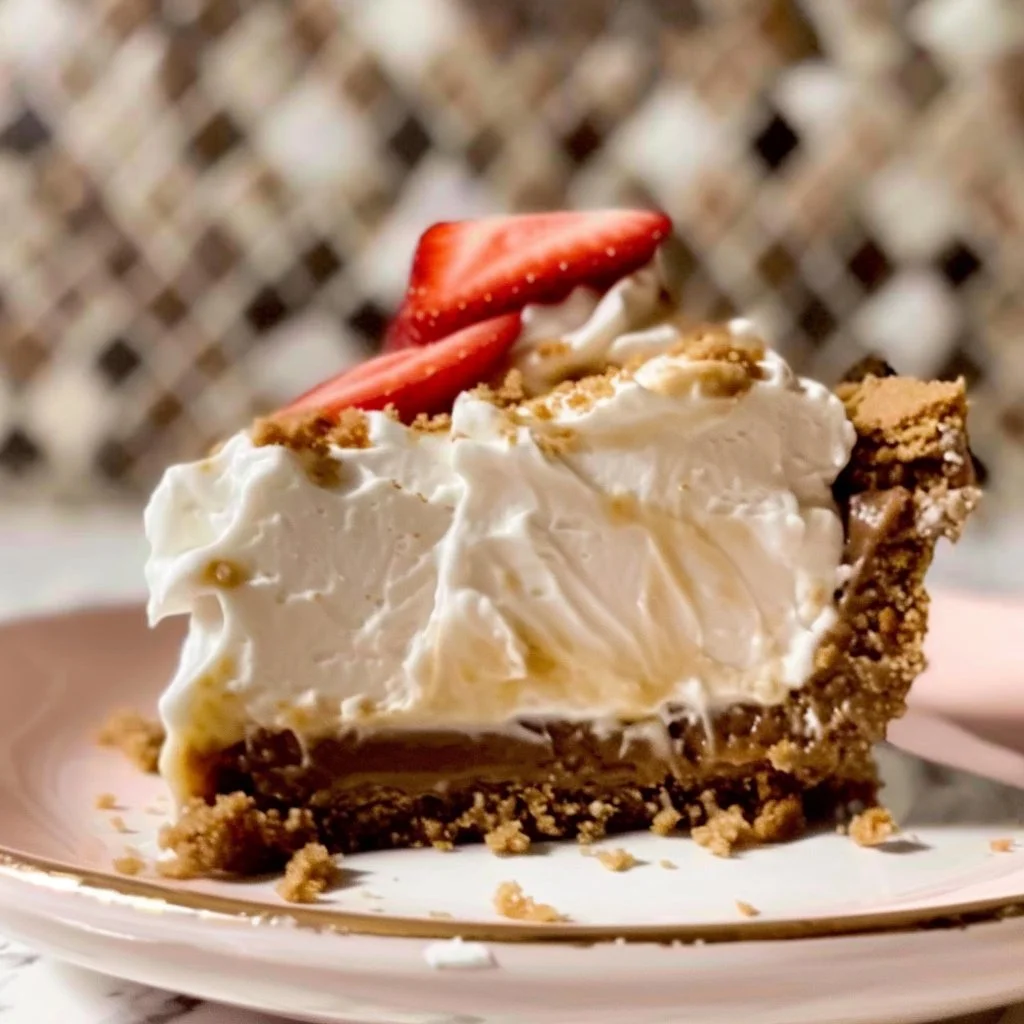
- Pour the mixture into a 9-inch or 10-inch springform pan, pressing it firmly into the bottom and up the sides. The tighter you pack it, the less likely it will fall apart when cutting the cheesecake.
- Freeze the crust for 10-20 minutes as you prepare the filling.
- In a clean mixing bowl, whip the cold heavy cream unto stiff peaks on medium-high speed for about 4–5 minutes. Set aside.
- In another bowl, beat together the softened cream cheese and granulated sugar until the mixture is perfectly smooth and creamy.
- Scrape down the bowl as needed, then add the confectioners’ sugar, sour cream, lemon juice, and vanilla extract. Continue beating for 2-3 minutes on medium-high speed until fully combined and smooth.
- Gently fold the whipped cream into the cheesecake filling using a silicone spatula. Combine carefully to maintain the airiness from the whipped cream.
- Once combined, remove the crust from the freezer and pour the filling into it, smoothing the top with an offset spatula.
- Cover tightly with plastic wrap or aluminum foil and refrigerate for at least 6-8 hours, preferably overnight for best results.
- After chilling, carefully loosen the cheesecake from the rim of the springform pan and gently remove it.
- Use a sharp knife to cut into slices for serving, wiping the blade clean between cuts for neat slices.
- Serve with desired toppings and enjoy! Store leftovers in the refrigerator for up to 5 days.
Pro Tips for Perfect Cheesecake
- Whipping Technique: When whipping the cream, ensure the bowl and beaters are cold to achieve better peaks. This technique keeps the whipped cream airy and light.
- Chilling Time: The longer you let the cheesecake chill, the better it will set and taste, so try to resist the temptation to cut into it too soon.
- Serving Suggestions: Consider topping the cheesecake with fresh fruits, chocolate sauce, or a drizzle of caramel for an added flavor dimension.
- Stability: For an even sturdier cheesecake, consider adding gelatin to the filling, especially in warmer months where it may need a bit more support.
Delicious Variations
- Vegan Version: Substitute cream cheese with a vegan alternative made from nuts or tofu, and use coconut cream in place of heavy cream for a delightful twist.
- Berry Swirl: Incorporate a layer of berry puree or fresh fruit into the filling for added flavor and a colorful presentation.
- Chocolate Chip Delight: Fold mini chocolate chips into the cheesecake filling for extra texture and sweetness for chocolate lovers.
- Regional Flavor: Experiment with spices like cinnamon or pumpkin spice to evoke seasonal flavors, making it a perfect dessert for holidays.
Perfect Pairings
- Sides: Pair this cheesecake with a refreshing fruit salad or a light lemon sorbet to cleanse the palate.
- Drinks: A glass of chilled iced tea or a fragrant herbal tea complements the richness of the cheesecake beautifully.
- Desserts: Follow this cheesecake with delicate pastries or chocolate-covered strawberries for a delightful dessert spread.
Make-Ahead Tips
- Preparation: This cheesecake is ideal for making a day in advance, giving you ample time for chilling.
- Storage: Keep the cheesecake tightly covered in the refrigerator, ensuring freshness before serving.
- Freezing: While it can be frozen, it’s best enjoyed fresh. If freezing, wrap it well to prevent freezer burn for up to a month.
- Reheating: No reheating is necessary; the cheesecake is meant to be served chilled for the best flavor and texture.
Presentation Ideas
- Plating: Serve slices on stylish dessert plates with a sprig of mint or edible flowers for a lovely touch.
- Textures: Add texture by incorporating a crunchy topping, such as nuts or crumbled graham crackers, before serving.
- Cozy Vibes: Create a warm atmosphere with soft lighting and comfortable seating while serving this beautiful dessert.
Kitchen Secrets to a Great Cheesecake
- Room Temperature Ingredients: Always ensure your cream cheese and sour cream are at room temperature, as this helps avoid lumps and creates a smoother mixture.
- Fold, Don’t Stir: When combining the whipped cream with the filling, gently fold instead of stirring to maintain the lightness of the mixture.
- Springform Pan: Using a springform pan ensures easy removal of the cheesecake without fuss and provides a lovely presentation.
- Test for Doneness: Gently shake the pan; the center should have a slight jiggle but not be liquid. This indicates it is perfectly set.
Proper Storage Solutions
- Refrigeration: Store leftover cheesecake in the fridge, tightly covered to retain moisture and flavor for up to five days.
- Freezing Tips: If freezing, cut into portions for easy thawing. Wrap each slice carefully in plastic wrap and store them in an airtight container.
- Texture Maintenance: Avoid leaving the cheesecake uncovered in the fridge, as it may absorb other flavors and lose its creamy texture.
- Bringing Back to Life: If the cheesecake becomes too frozen, let it thaw in the refrigerator before cutting and serving to achieve the best texture.
FAQ
How long should I chill the no-bake cheesecake?
For optimal results, chill the cheesecake for at least 6-8 hours, but overnight is preferred. The longer it chills, the more set it will become and the flavor will deepen.
Can I use low-fat cream cheese?
While low-fat cream cheese can be used, it may not yield as creamy a texture. For the best results, full-fat cream cheese is recommended for a richer experience.
What can I use instead of graham crackers for the crust?
You can use crushed digestive biscuits, vanilla wafers, or even Oreos for a chocolatey variation. Each option will yield a distinct flavor and texture.
Is there a gluten-free option for the crust?
Yes, gluten-free graham crackers or almond flour can be used to create a delicious gluten-free crust without sacrificing flavor.
How do I know if the cheesecake is set properly?
The cheesecake will have a slight jiggle in the center. If it wobbles too much, it needs more chilling time. The edges should be firm while the center retains some softness.
Can I add toppings before chilling the cheesecake?
It is best to add toppings just before serving to keep them fresh and flavorful. This helps maintain the presentation and prevents sogginess.
Nutrition Info
- Serving Size: 1 slice
- Calories: 350
- Protein: 5g
- Carbs: 30g
- Fat: 25g
- Fiber: 1g
- Sugar: 15g
Nutrition facts are estimates and may vary.
Personal Reflection
This no-bake cheesecake represents much more than just a dessert; it’s a celebration of togetherness and shared moments. Each ingredient carries a story, whether it’s from a treasured recipe passed down through generations or a spontaneous gathering of friends. The warmth of home-cooked flavors brings a comforting familiarity that unites us all. Enjoying this cheesecake is about savoring every bite while creating new memories around the table.
Closing Thoughts
Embark on a delightful culinary journey by making this no-bake cheesecake today. It invites you to experiment with flavors and share warmth with loved ones. This easy, luscious dessert is sure to enchant your friends and family, creating a sweet moment that lingers long after the last slice is gone. So, gather your ingredients, roll up your sleeves, and indulge in the comfort of creating something amazing in the kitchen. Don’t forget to share and pin this recipe for others to enjoy too!
No-Bake Cheesecake
Ingredients
Method
- Stir the graham cracker crust ingredients together until well mixed.
- Pour the mixture into a 9-inch or 10-inch springform pan, pressing it firmly into the bottom and up the sides.
- Freeze the crust for 10-20 minutes as you prepare the filling.
- In a clean mixing bowl, whip the cold heavy cream unto stiff peaks on medium-high speed for about 4–5 minutes. Set aside.
- In another bowl, beat together the softened cream cheese and granulated sugar until the mixture is perfectly smooth and creamy.
- Add the confectioners' sugar, sour cream, lemon juice, and vanilla extract. Continue beating for 2-3 minutes on medium-high speed until fully combined and smooth.
- Gently fold the whipped cream into the cheesecake filling using a silicone spatula.
- Once combined, pour the filling into the crust, smoothing the top with an offset spatula.
- Cover tightly and refrigerate for at least 6-8 hours, preferably overnight.
- After chilling, carefully loosen the cheesecake from the rim of the springform pan and gently remove it.
- Cut into slices for serving, wiping the blade clean between cuts for neat slices.
- Serve with desired toppings.